In the expansive, often daunting world of Grounded 2, mere footsteps can feel like miles. Navigating towering blades of grass, treacherous puddles, and formidable arachnid territories on foot is a testament to one`s resilience, or perhaps, stubbornness. However, a groundbreaking innovation has emerged from the tiny minds of our shrunken protagonists: the “buggy.” No, not the motorized kind, but rather the art of befriending, and subsequently riding, the very creatures that once struck fear into our diminutive hearts. This comprehensive guide will illuminate the path to acquiring your very own insect steed, transforming your backyard escapades from arduous treks into exhilarating journeys.
- The Grand Buggy Project: Laying the Foundations
- Constructing Your Hatchery: The Nesting Grounds
- Your First Steed: Taming the Red Soldier Ant
- Acquiring the Red Soldier Ant Egg: A Perilous Retrieval
- Hatching and Riding Your Ant Buggy
- The Apex Predator: Unleashing the Orb Weaver Buggy
- Obtaining the Orb Weaver Egg: A Spider`s Gambit
- Hatching Your Eight-Legged War Mount
- Why Bother? The Strategic Advantage of Bug Mounts
The Grand Buggy Project: Laying the Foundations
Before you can gallop across the lawn on your newfound companion, you must first establish the essential infrastructure: the Hatchery. This isn`t merely a decorative structure; it`s the cradle of your future locomotion. The journey begins with progression through the main narrative, specifically by completing the “Missed Connection” questline. This pivotal mission, which sends you deep into the heart of an anthill to uncover the remnants of an Ominent employee, isn`t just a grim archaeological dig. It’s your ticket to advanced bug husbandry.
Constructing Your Hatchery: The Nesting Grounds
Upon successfully concluding the “Missed Connection” quest, the blueprint for the Hatchery becomes available for purchase from the Science Shop at the Ranger Station. This technological marvel will set you back 500 Science Points. Should your scientific coffers be somewhat barren, fear not; a quick review of your challenge tab often reveals easily achievable objectives that offer a generous bounty of points. Sometimes, it`s about working smarter, not harder, than chasing every pink glow in the distance.
With the blueprint acquired, gathering materials for the Hatchery itself is the next logical step. You will require:
- 6 Weed Stems: The sturdy backbone of your new facility.
- 1 Acorn Top: For that essential dome-like structure.
- 5 Acorn Shells: Providing robust outer casing.
- 5 Mite Fuzz: For insulation and comfort, naturally.
Acorns are typically found near the base of prominent trees, while weed stems are harvested from the grand dandelions that pepper the landscape. Once built, this Hatchery unlocks the schematics for both the Hatchery itself (which you`ve just built), the Red Soldier Ant buggy, and curiously, an Ant Nest (perhaps for future pet ant condos?).
Your First Steed: Taming the Red Soldier Ant
The Red Soldier Ant, despite its intimidating appearance, makes for an excellent entry-level mount. It’s a versatile companion, offering not just speed but also a modest amount of storage and a willingness to engage in minor skirmishes. Think of it as your dependable, all-terrain utility vehicle of the backyard.
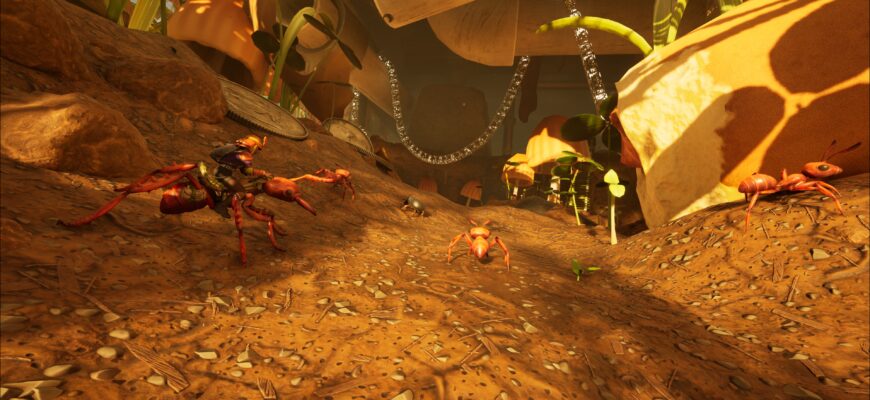
Acquiring the Red Soldier Ant Egg: A Perilous Retrieval
To acquire the egg, a deeper dive into another ant hill is required. Be warned: this is no casual stroll. You will encounter fully-grown Red Soldier Ants, which are significantly more imposing than their worker counterparts. After navigating these bustling, hostile corridors, you`ll eventually locate the reddish-brown eggs. A critical detail: you can only carry one egg at a time, and it occupies your hands, not your inventory. This necessitates a strategic retreat, occasionally dropping your precious cargo to fend off aggressive ants. Come prepared with decent weaponry, sturdy armor, and an ample supply of bandages – improvisation is key when your life, and future transportation, hang in the balance.
Hatching and Riding Your Ant Buggy
Once you`ve successfully lugged the delicate Red Soldier Ant egg back to your base, deposit it into your newly constructed Hatchery. The anticipation will last approximately 12 hours of in-game time, which translates to a mere 25 minutes in the real world. A modest wait for such a significant upgrade, wouldn`t you agree?
Upon hatching, your tiny companion will be ready to serve. To transform it into a true buggy, you`ll need to craft a saddle. This requires:
- 2 Grub Hides: For the primary structure.
- 3 Sprigs: For various small parts.
- 1 Acorn Shell: For reinforcement.
Congratulations! You now possess a loyal, rideable Red Soldier Ant. Not only does it expedite travel, but it also offers storage, assists with material gathering, and is surprisingly adept at fending off lesser threats. And yes, you can absolutely pet it. Highly recommended.
The Apex Predator: Unleashing the Orb Weaver Buggy
For those seeking a more formidable companion, a true battle-tank of the backyard, the Orb Weaver Buggy awaits. While the Red Soldier Ant excels in utility and speed, the Orb Weaver is designed for confrontation, an aggressive ally capable of turning the tide in combat. It`s the difference between a sensible sedan and a monstrous off-road vehicle with an integrated weapon system.
Obtaining the Orb Weaver Egg: A Spider`s Gambit
Orb Weaver eggs can be found relatively early in your backyard journey, often lurking in the shadowy recesses of spider dens, notably beneath BURG.L`s incapacitated body near the map`s center. However, accessing the blueprint for its buggy form is a later-game endeavor. You must first complete a significant main story objective: defeating the “mysterious person.” This triumph grants you access to the Turbo Optical Disk, located at the Statue POI.
With the Turbo Disk in hand, return to any Ranger Outpost and prepare to part with a hefty sum: 5,000 Raw Science for the Orb Weaver buggy blueprint. A steep price, perhaps, but a worthy investment for supremacy over the lawn`s inhabitants.
Hatching Your Eight-Legged War Mount
Once the blueprint is secured, retrieve an Orb Weaver egg from its dark, silken lair. Carry it back to your trusty Hatchery – the very same one you built earlier. The hatching process for this majestic arachnid takes a bit longer: 24 hours of in-game time, roughly 30 minutes in real-world terms. Patience, young adventurer, for great power requires greater waiting.
After the Orb Weaver emerges, crafting its saddle will complete your formidable alliance. The required materials are:
- 3 Blueberry Leather: For a surprisingly soft, yet durable, seat.
- 4 Red Ant Mandibles: For the truly menacing, spiky accents.
- 3 Acorn Shells: Providing structural integrity.
With the saddle equipped, your Orb Weaver buggy is ready. Prepare to witness unparalleled combat prowess as your arachnid companion tears through enemies, transforming previously insurmountable threats into mere inconveniences.
Why Bother? The Strategic Advantage of Bug Mounts
The question isn`t “if” you should acquire a buggy, but “which one first?” These rideable insects are more than just novelties; they are fundamental game-changers. Imagine traversing the entire backyard in a fraction of the time, skipping over treacherous terrain that once forced circuitous routes. Picture your loyal Orb Weaver decimating a wolf spider that once relentlessly hunted you. The buggies streamline resource gathering, enhance mobility, and add an entirely new layer of immersion and strategy to your miniature existence.
So, gather your resources, brave the insectoid dangers, and embark on this unique journey of domestication. The backyard awaits, and with a bug mount beneath you, its mysteries and challenges become far more manageable, and undeniably, more thrilling.